No matter where you purchased your domain, you may still use it with your new hosting account.
In order to use it with your new hosting account, you will need to configure the DNS (Domain Dame System) / set Nameservers, to point to your new Hostgator web hosting accounts.
1. Get the Hostgator name servers for your hosting account
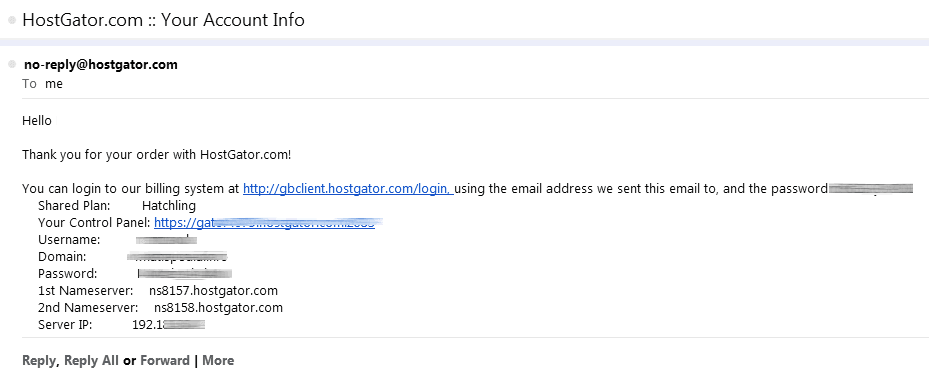
You can find the Nameserver information inside of your HostGator welcome email. Check your inbox for the welcome email which was sent when you signed up for web hosting and this will contain the name servers listed for your hosting account.
 There will be two Nameservers provided: 1st Nameserver, and 2nd Nameserver
2. Go the website where you purchased your domain, and Update the Nameserver
You will need to change the DNS / Nameservers to custom nameserver: that is, to the NameServers (both 1st Nameserver, and 2nd Nameserver) provided in the email.
Here are instructions to changing the Nameservers at the most popular domain registrars.
Registry Rocket (eNom Resellers)
If you don’t see the site where you purchased your domain listed here – you can still log into your account, look for the Domain and DNS management menu item, then locate the Nameservers and then change them to reflect both 1st Nameserver, and 2nd Nameserver provided in the Welcome email.
Once you have made changes to your name servers , there may be up to 24-48 hours of DNS propagation time during which your website and email may not be available. However, for most services this process completes within about an hour or less.
